
THERE IS A NEW METHOD TO SETUP CEMU WITH MOUSE AND KEYBOARD LINK HERE: https://gamerwelfare.com/2022/08/26/cemu-with-mouse-and-keyboard-new-method/
The old method(which is described in this article) still works but you have to download an older version of Cemu to do it and when you finish you can then update to the latest one. With the new method, you don’t need to download an older version.
Hi guys! Today I will teach you how to use a mouse and keyboard to play games on Cemu. It probably won’t work on all games, but one game that it will surely work on is BotW. This process is tested and if you follow every step to the letter, I guarantee you that it will work out.
Before I begin I have to warn you THE GUIDE DOESNT WORK FOR CEMU version 1.26.0 or later (probably the “later” part since I don’t know if something changes in the future) so you have to go here https://cemu.info/changelog.html and download cemu v1.25.6, create the controllerProfiles folder in Cemu location manually and do the rest of the process as I show in the guide. You can update to the latest version of Cemu after you finish the whole process I show in the guide since the controller profiles won’t be affected.
What you will need:
Besides Cemu, you will need to download two files from the same website. The website is safe and the files don’t contain any viruses.
Here are the links:
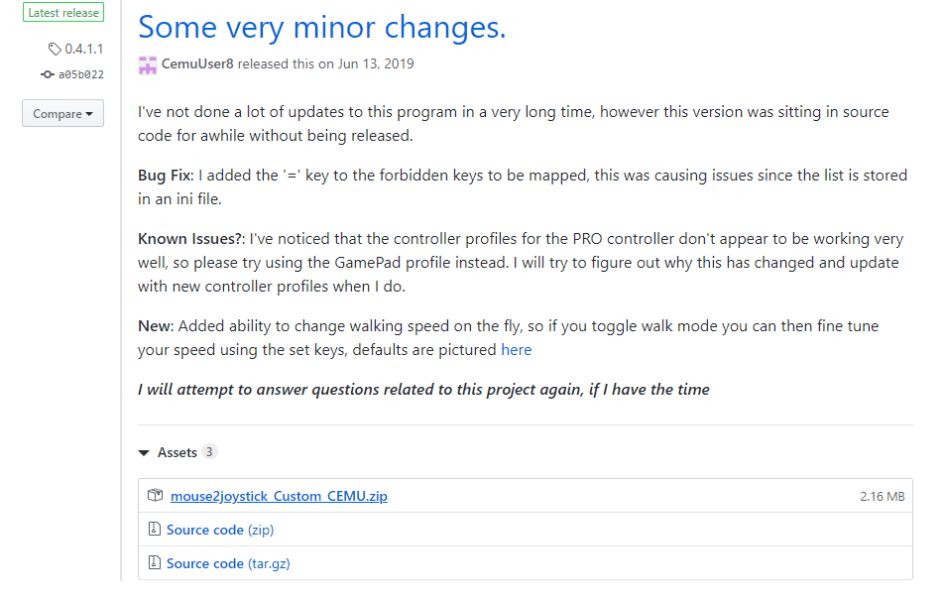
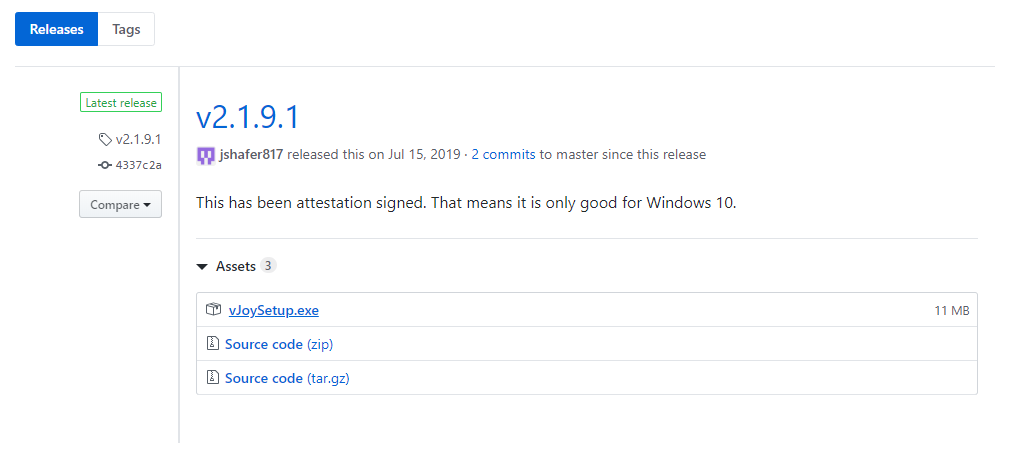
https://github.com/CemuUser8/mouse2joystick_custom_CEMU/releases https://github.com/jshafer817/vJoy/releases/tag/v2.1.9.1
From the first link, you will need to download this file: mouse2joystick_Custom_Cemu.zip
From the second link, you will need to download this file: vJoySetup.exe
Now that you have both files let’s begin the process.
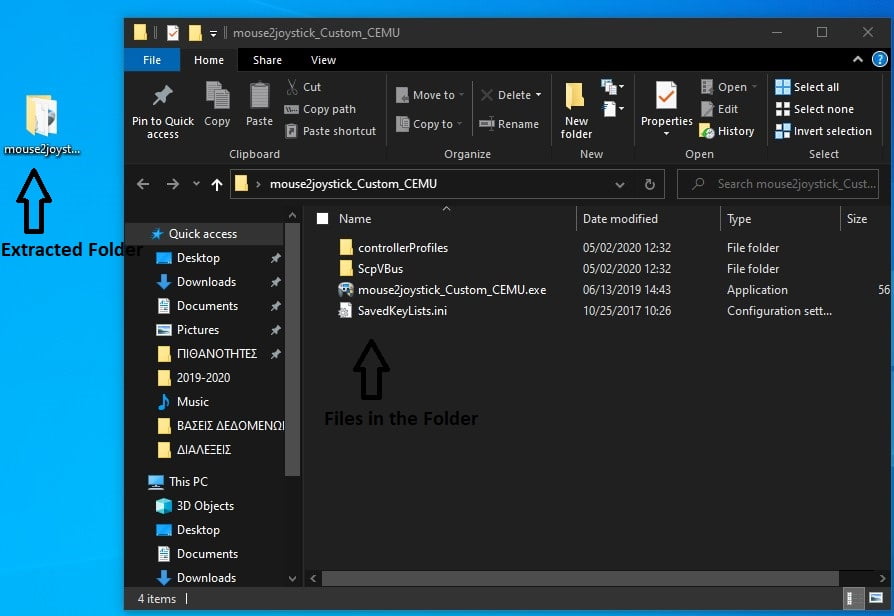
First, you need to extract this file: mouse2joystick_Custom_Cemu.zip
Here is what you will get after extraction:
Next, you need to double click the vJoySetup.exe(the first file I told you to download) and install vJoy. You don’t need to change the installation settings just click Next all the time till Install button appears and then click install.
After you finish with the installation open the Windows search bar and type configure vjoy and open the Configure vJoy app.
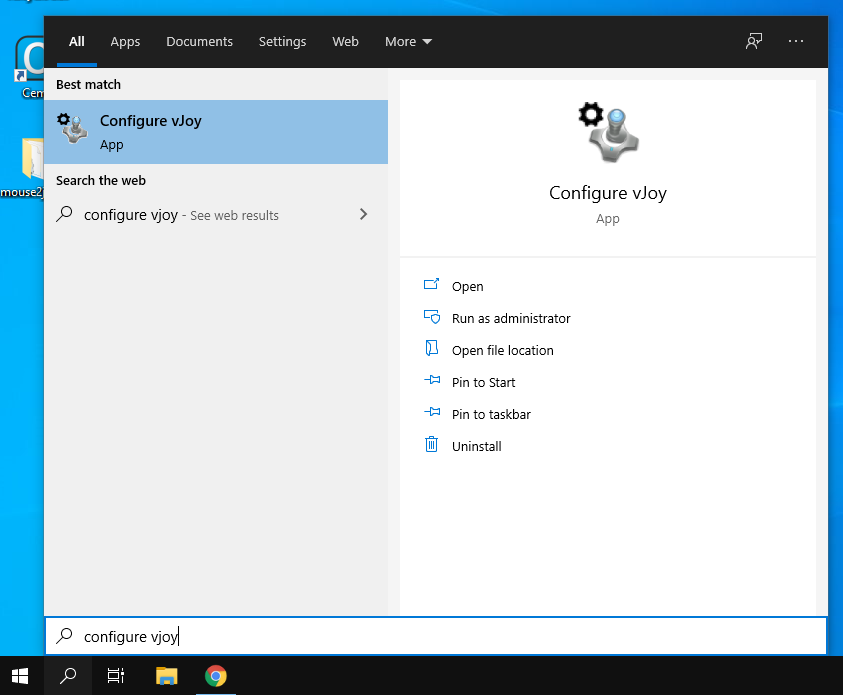
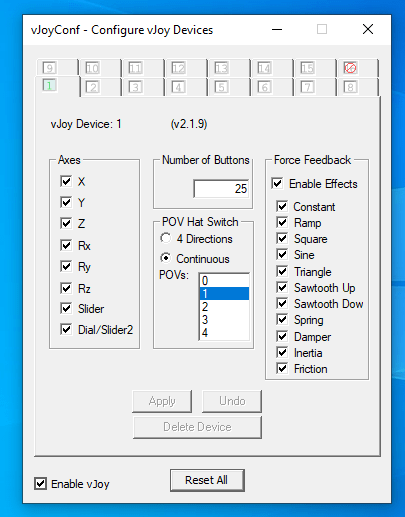
When you open the app a window will pop up. Copy all my settings exactly as shown in the image below and click apply. Then close the window.
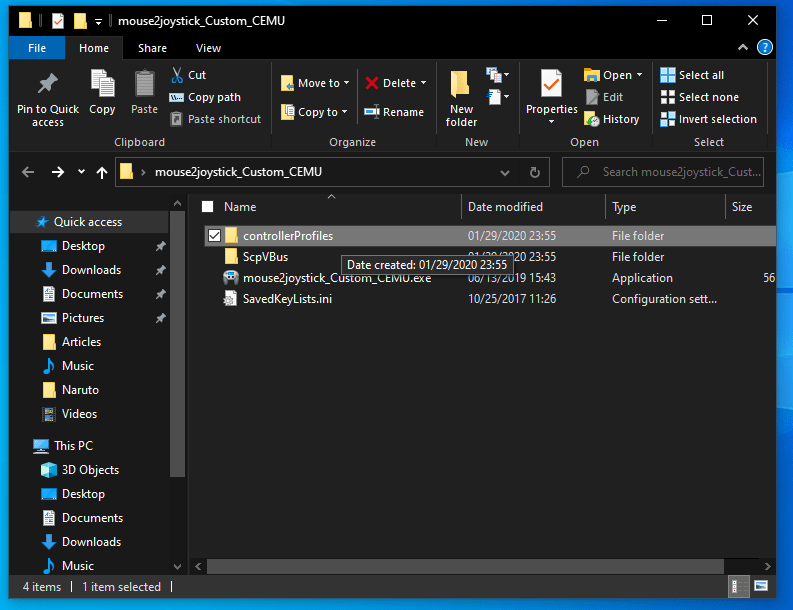
Now I want you to go to the folder that you extracted before from mouse2joystick_Custom_Cemu.zip and open controllerProfiles folder.
This is the folder:
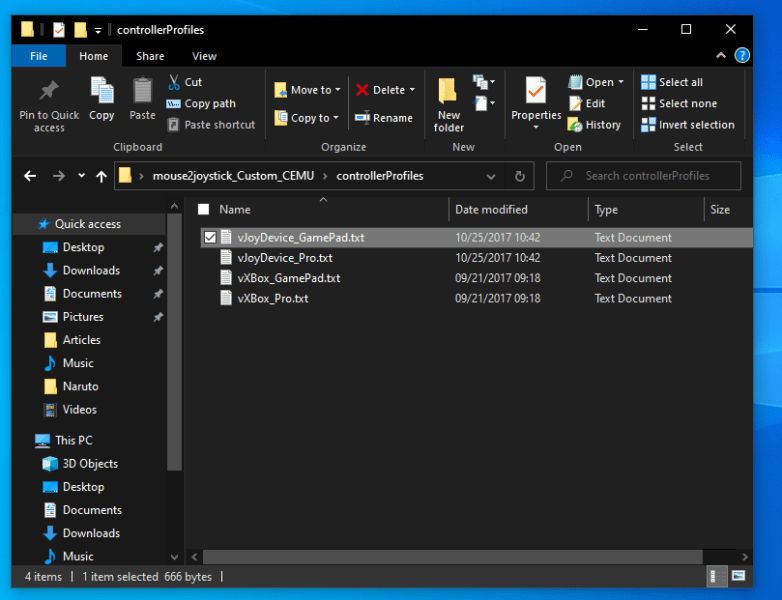
Inside the folder, you will see 4 files. Right-Click on the file named vJoyDevice_GamePad.txt and click Copy.
This is the file:
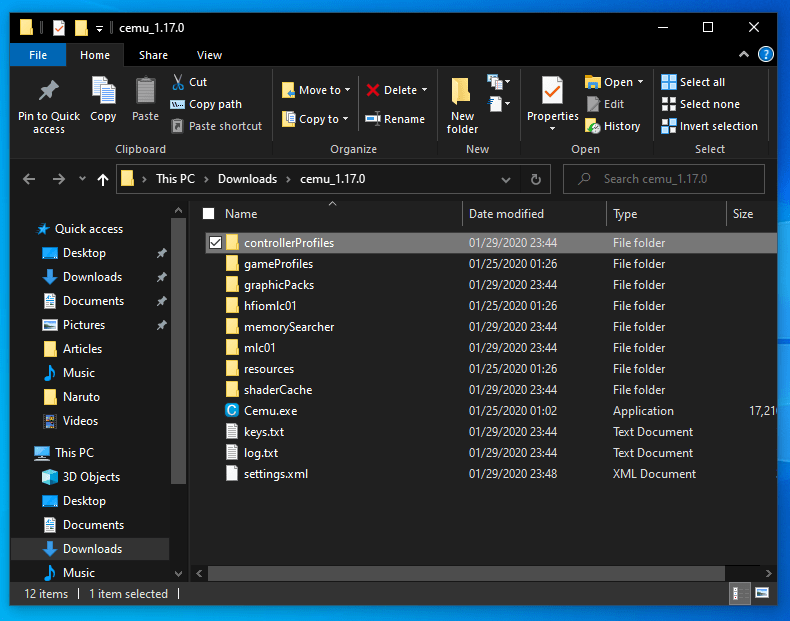
Now I want you to go to the location you have Cemu on your PC and find controllerProfiles folder. If you have a Cemu shortcut on Desktop you can right-click on it and click on Open file location so that you can find the folder easier.
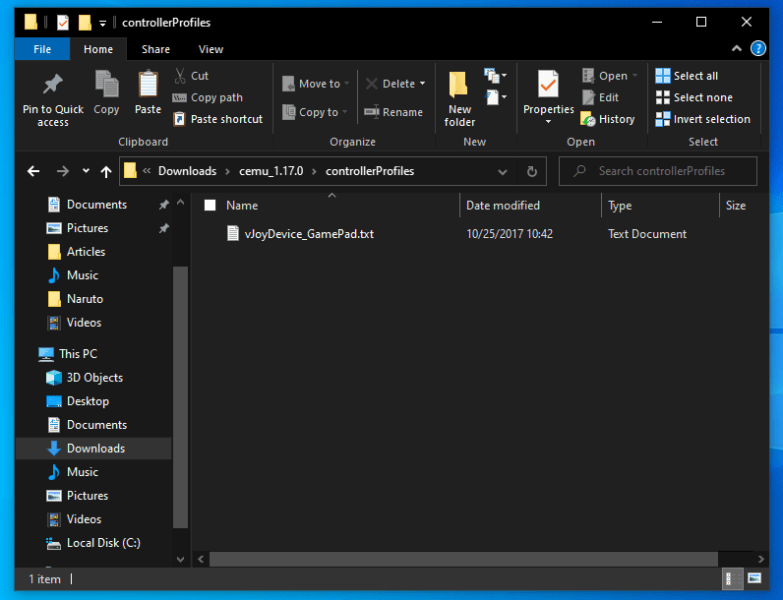
This is the folder:
Open the folder. Right-click in the space inside the folder and paste the file you copied before.
Here is what the end result will be:
Now I want you to open Cemu.
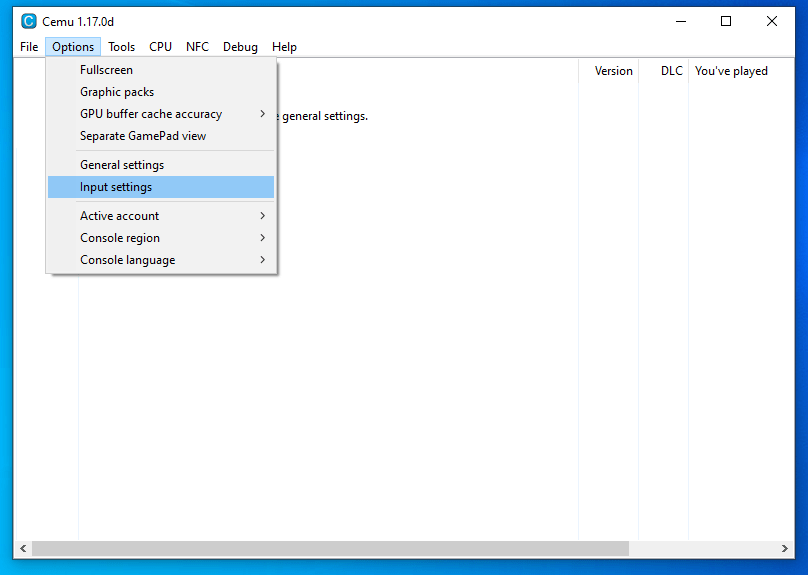
In the menu at the top of the window click on Options then click on Input Settings.
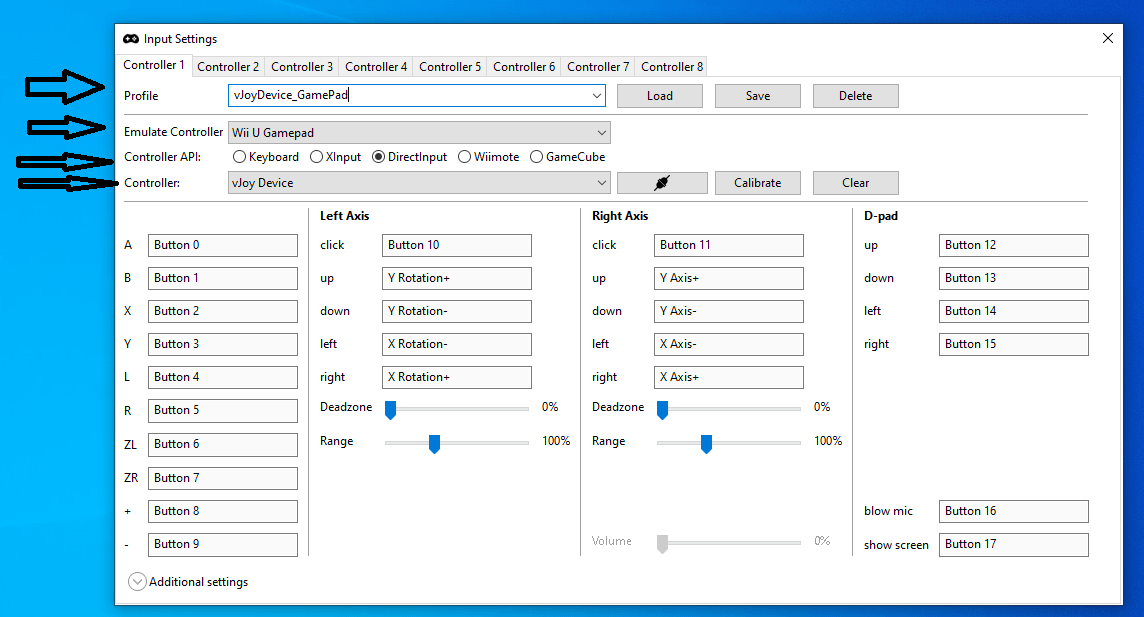
On the window that will open up, in the Profile setting click on the arrow to the right and choose vJoyDevice_GamePad, in the Emulator Controller setting choose Wii U Gamepad, in the Controller Api setting choose Direct Input and in the Controller setting choose vJoy Device. Then click Load and close the window.
Here is what the window should look like before you close it:
Now I want you to go again to Options then click again Input Settings and open that window again.
After you open it below the Right Axis you will see an option named Range, set that to maximum percentage. If in the Profile setting says <profile name>, click on the arrow to the right and choose vJoyDevice_GamePad. Then click Save. If the Profile setting changes to <profile name> again, it’s ok, just ignore it and close the window.
This is the image just before I clicked Save.
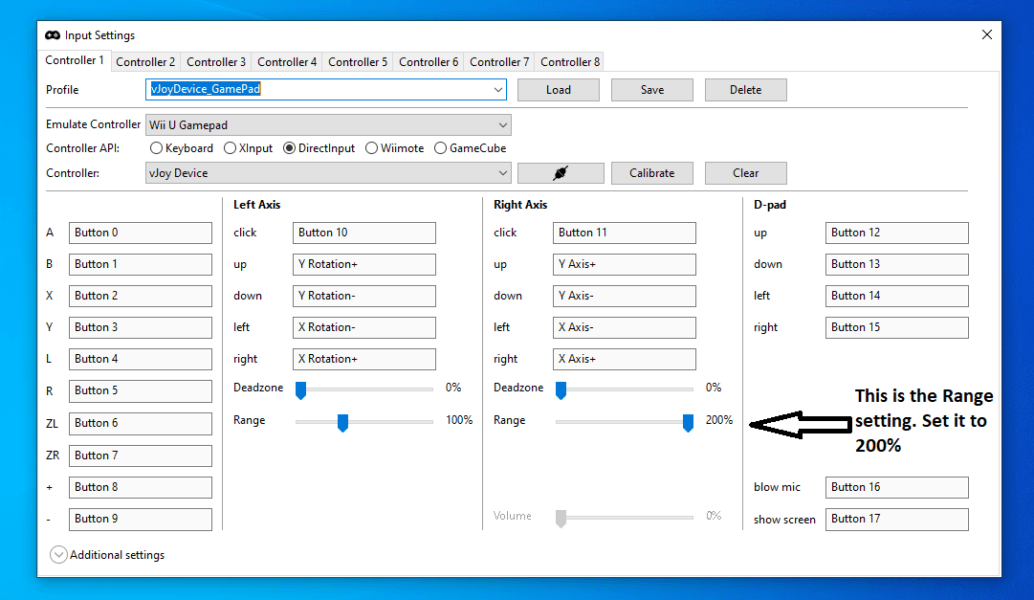
This is the image after I clicked Save.

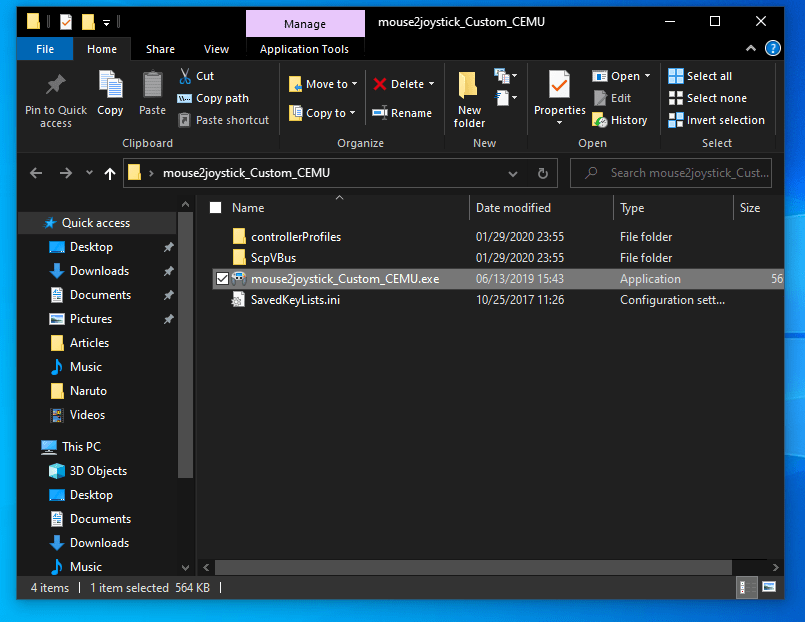
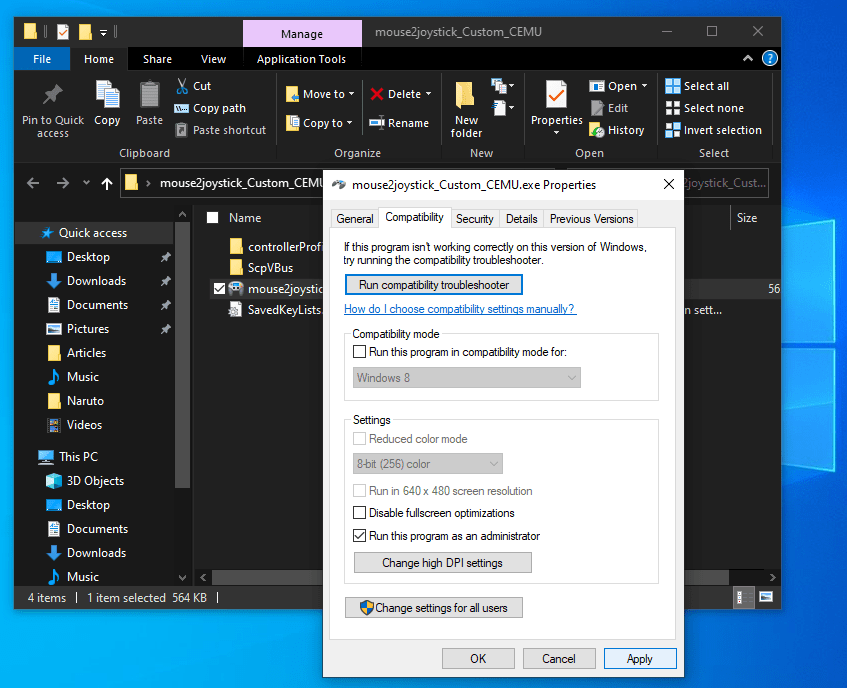
Now I want you to go to the folder that you extracted from mouse2joystick_Custom_Cemu.zip right-click on mouse2joystick_Custom_CEMU.exe and then go to Properties. Then I want you to go to the Compatibility menu. Make sure Run this program as an administrator is checked. Then click Apply, then click OK.
Here is the image of the file.
Here is how it should look like before you click Apply.
After you click OK. I want you to double-click mouse2joystick_Custom_CEMU.exe. If it is running then you should see this:
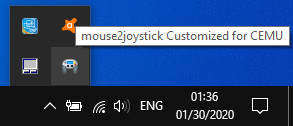
This program should be running before you open a game with Cemu in order to be able to play with mouse and keyboard. If you right-click on that icon and then click Settings you can change a lot of things like sensitivity or the key bindings that you will use to play games. Ask me in the comments below if you have any questions about this. You can change the sensitivity of the camera because it is a little slow in some games.
To change key bindings go to the menu I show below, you can find it on mouse2joystick settings(right-click on mouse2joystick icon from the taskbar and then click Settings), after you go there, click on KeyList Helper to change key bindings:
To change the script activation key from F1 to another key go here (you can find it on mouse2joystick settings, to go there right-click on mouse2joystick icon from the taskbar and then click Settings):
You can find the keyboard mapping here: https://imgur.com/a/Y29TyN9
Also, I would like to mention – is M on the keyboard. It doesn’t show it in the image.
Now on to the last step. Open whichever Cemu game you want. Once the game window opens up press F1 on your keyboard to activate the script in order to be able to play with mouse and keyboard. THIS IS VERY IMPORTANT, DON’T FORGET IT SINCE IT WON’T WORK WITHOUT IT. In order to deactivate script press F1 again.
When you press F1 to activate the script the mouse cursor will disappear from your screen. Don’t worry. This is because the script is running. If you press F1 again to deactivate the script then the mouse cursor will appear again.
Some games might require gyroscope/motion controls. For those games watch this video:
https://www.youtube.com/watch?v=0pp1B8S7yxI&feature=youtu.be
I also recommend you to watch Cemu Complete Setup Guide:
https://www.youtube.com/watch?v=Bw7qa94P0ls
This was the guide. Thanks for reading it, and I hope that all went well without problems. If you have faced any problems or have any questions feel free to comment below and ask.
You can support us and get notified when we post a new article by following us on Twitter, liking our Facebook Page and sharing our articles.


I have a problem.I did everything but when I open the game only the arrows and the tab button works. I checked the number of buttons in the vjoy app and its 25 but it stll wont work.
The game is Zelda BOTW
Hi and thank you for this. How do I remap the keys? Thanks
The Button Fields empty as soon as i change to direct imput. Script works, but no Buttons work.
Hi I love your program so much I always use this for Zelda Thankyousomuch for making a good program like this
and is it possible to use this outside cemu like use this for other games (not cemu game)
Hi,
Thanks for the great work!
However, after following your steps, running mouse2joystick as admin, pressing f1, I can still only press tab in screen, no other key seems to work.
Thanks for your suggestion to fix this!
For me it works on New Sup Mario Bros U
did everything now the toggle doesnt work when i press f1 the cursor is still there and no key works at all
the game says unable to open file
My mouse2joystick doesn’t run on my pc, someone can help me?
How do you change the sensitivity? setting it to the lowest is still quite slow, does changing the non linear sens work?
I cant WALK and play ,
Some keys not working on keyboard, like Start button. Any idea?
Where are you setting up the keyboard for moving and such? It appears you have it all set to buttons
Awesome post! Keep up the great work! 🙂
Thanks for the guide. It worked great.